These Greek yogurt popsicles taste like frozen peanut butter cups! They’re made with wholesome ingredients and dark chocolate for an easy treat both kids and adults love. Plus, no popsicle mold required!
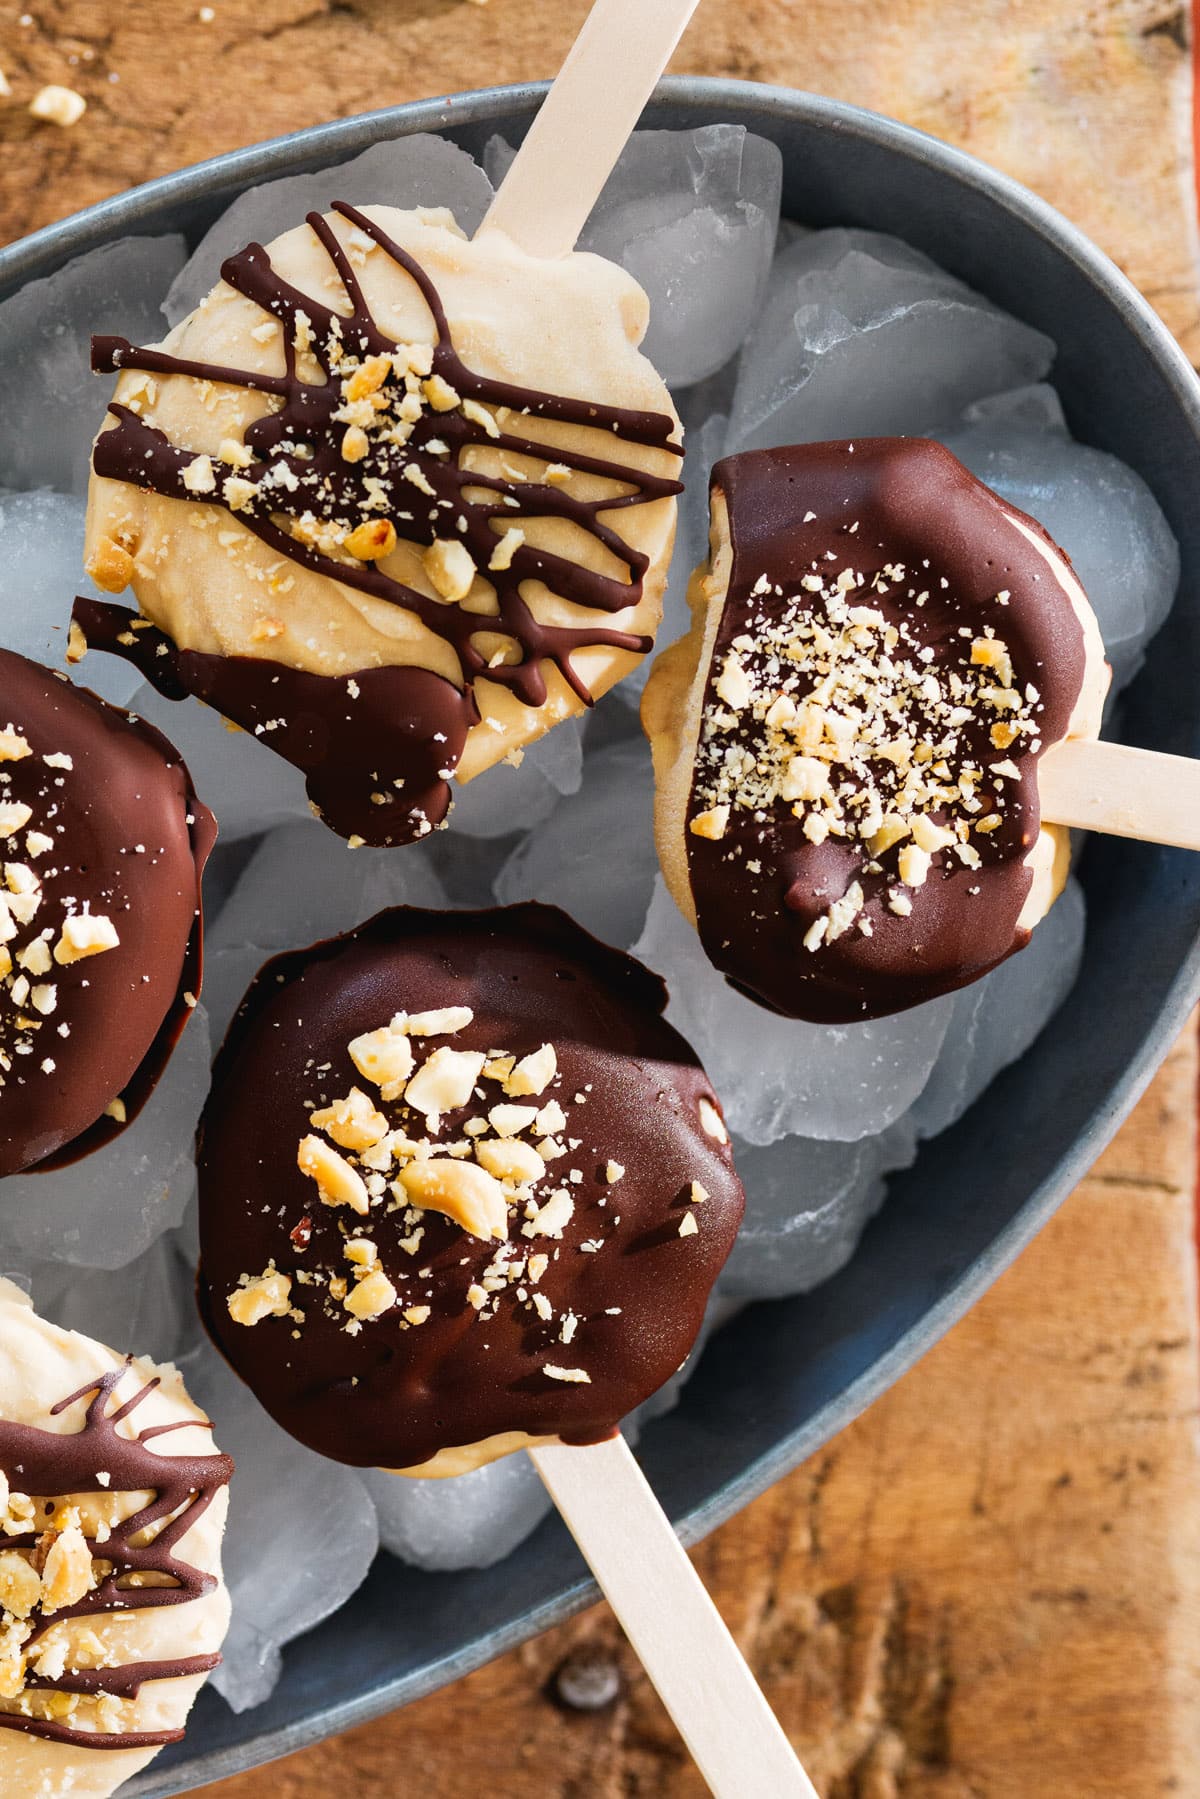
Every summer I try to come up with some fun, lighter frozen treats, and here is this year’s star recipe: my peanut butter cup Greek yogurt popsicles with dark chocolate Magic Shell!
OK imagine this: there’s a creamy, nutty Greek yogurt base that takes just a few minutes to stir together. Then there’s the homemade dark chocolate Magic Shell that hardens into a crisp shell when your drizzle it onto frozen pops. I brought some out to our neighbor’s pool party and everyone absolutely raved (both kids and adults)!
Why You’ll Love These Popsicles
- No popsicle molds required. You scoop the base into dollops and freeze: no special molds or equipment needed!
- Quick and easy to make. The hands on time is minimal.
- Just a handful of wholesome ingredients. Greek yogurt, peanut butter and maple syrup: and it’s so good!
- That homemade dark chocolate Magic Shell. Just two ingredients make that satisfying crack when you bite in.
Ingredients You’ll Need
I came up with this Greek yogurt popsicle idea based on my froyo bites and my peanut butter dip, which are made with similar ingredients. Here’s what you need:
- Whole milk Greek yogurt: Full-fat Greek yogurt freezes the creamiest and brings the protein, so I don’t recommend going low-fat.
- Creamy unsweetened peanut butter: I like using a no-sugar-added, drippy creamy style, but any style works.
- Pure dark maple syrup: This is important: I like buying “Grade A: Dark Color and Robust Flavor” for the right sweetness here.
- Vanilla extract: Just a little makes everything taste amazing.
- Dark chocolate chips: The dark chocolate sets up firm and crisp. I like using a small amount of chocolate and dipping about ½ fully and then drizzling over the remainder (for a lighter option).
- Coconut oil (refined): This is the secret to the shell! It makes plain chocolate into a homemade dark chocolate Magic Shell: the kind that hardens into a crisp, snappy coating. Make sure it’s refined coconut oil so it doesn’t taste coconut-y.
- Crushed peanuts: For garnish and crunch! I also have a few more variation ideas for toppings below.
How to Make Greek Yogurt Popsicles
The full measurements are in the recipe card below, but here’s the rhythm of it:
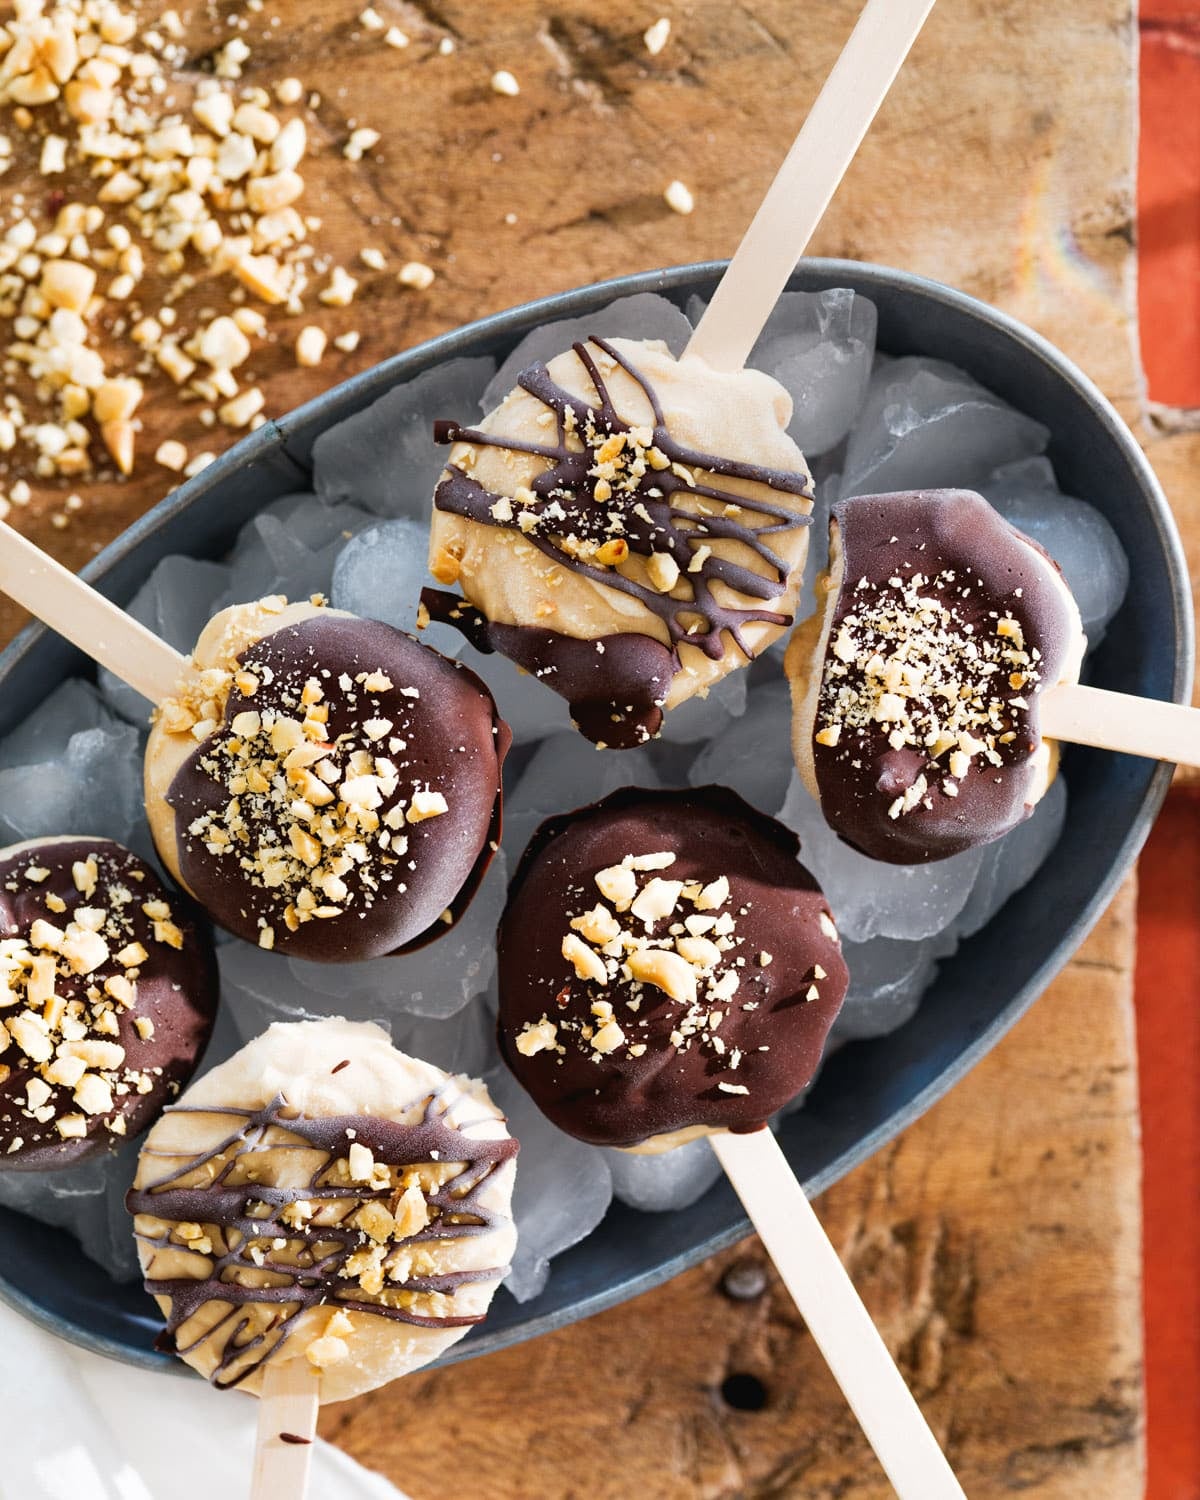
1. Mix and dollop the base. Stir the yogurt, peanut butter, maple syrup, and vanilla until smooth, then scoop the mixture into dollops on a parchment-lined tray. I like using a #40 cookie scoop to measure it out, if you have one. Flatten each one slightly, add a stick, and freeze for an hour until firm enough to dip.
2. Coat in dark chocolate. Melt the chocolate chips with coconut oil in short microwave bursts, stirring between each. Spoon it over each frozen pop to fully coat, then sprinkle with crushed peanuts while the chocolate is still wet so it sticks.
3. Freeze and serve. A final 15 minutes in the freezer sets the shell, and they’re ready.
My Homemade Magic Shell
If there’s one part of this recipe I’m proud of, it’s the shell. Store-bought magic shell is mostly coconut oil and sugar, but you can make a better version at home with just two ingredients: dark chocolate and coconut oil.
I tested this recipe with just chocolate without the oil, and the coating was very hard and thick. Adding the coconut oil helps to soften the texture of the shell. Don’t substitute any other type of oil here because the high saturated fats in coconut oil are what make the perfect smooth but crack-able texture.
Serving Suggestions
As I mentioned above, I have served these to friends and neighbors with raving reviews! They are so fun and easy to make.
- Use them as a lighter dessert for any summer potluck, cookout or picnic (they’re a great Mediterranean diet dessert option, especially with the drizzle)
- Make them in a dessert spread alongside chocolate covered bananas or chocolate covered strawberries.
- Mix up the toppings: try flaky sea salt, crushed pretzels, shredded coconut, or freeze-dried strawberries or raspberries
Storage Instructions
Freeze the finished popsicles for 1 hour, then transfer them to a sealed container and keep frozen for up to 2 months. They’re best straight from the freezer with a few minutes at room temperature to soften them.
Dietary Notes
These Greek yogurt popsicles are vegetarian and gluten-free. To make them vegan, use a dairy-free yogurt (I like coconut based) and make sure your chocolate chips are dairy-free.
Greek Yogurt Popsicles (with Magic Shell)
These Greek yogurt popsicles taste like frozen peanut butter cups! They’re made with wholesome ingredients and dark chocolate for an easy treat both kids and adults love.
- Prep Time: 20 minutes
- Freeze Time: 1 hour 15 minutes
- Total Time: 1 hour 35 minutes
- Yield: 9 popsicles 1x
- Category: Dessert
- Method: Frozen
- Cuisine: American
- Diet: Gluten-Free, Mediterranean Diet, Vegetarian
Ingredients
For the popsicles
- ¾ cup whole milk Greek yogurt
- ¼ cup creamy unsweetened peanut butter
- 2 tablespoons pure dark maple syrup
- ½ teaspoon vanilla extract
For the chocolate coating
- ½ cup dark chocolate chips
- 1 tablespoon coconut oil (refined)
- Crushed peanuts, for garnish
Instructions
- Make the base: In a medium bowl, stir together the Greek yogurt, peanut butter, maple syrup, and vanilla extract until smooth. Line a tray with parchment paper, then scoop the mixture onto it in dollops of about 1 ½ to 2 tablespoons each (a size 40 cookie scoop makes this easy). Slightly flatten each dollop with the back of a spoon, insert a popsicle stick into each one, and freeze for 1 hour.
- Coat with chocolate: In a shallow microwave-safe bowl, melt the chocolate chips and coconut oil in two 20 to 30-second bursts, stirring between each, then a final 10-second burst if needed to finish melting (or a few seconds more if necessary with your microwave). Working one at a time, use a spoon to fully coat each popsicle in chocolate, or drizzle it over the tops for a lighter version. (I usually have enough chocolate to coat about 6 popsicles fully and then I drizzle the last 3! See Notes.) Sprinkle with crushed peanuts.
- Freeze and serve: Freeze again for 15 minutes, then serve. To store, freeze for 1 hour on the tray, then transfer to a sealed container and keep frozen for up to 2 months.
Notes
More chocolate: If you want to fully cover all 9 popsicles, increase the dark chocolate to ¾ cup and the coconut oil to 1 ½ tablespoon.
For vegan: Use a dairy-free yogurt (coconut or almond based) and make sure your chocolate chips are dairy-free.
Switch the nut butter or nut-free: Almond or cashew butter both work well in place of peanut butter. For nut-free, use sunflower butter or tahini.
Make it a PB&J version: Swirl a spoonful of your favorite jam into the yogurt base before scooping and omit the chocolate.
Change the topping: Try flaky sea salt, crushed pretzels, shredded coconut, or freeze-dried strawberries or raspberries instead of peanuts.
from A Couple Cooks https://ift.tt/fV58wEK
Comments
Post a Comment