These no bake energy bites are a wholesome snack that tastes like dessert and takes just 15 minutes to make! They’re made with peanut butter, oats, honey, and a hint of chocolate.
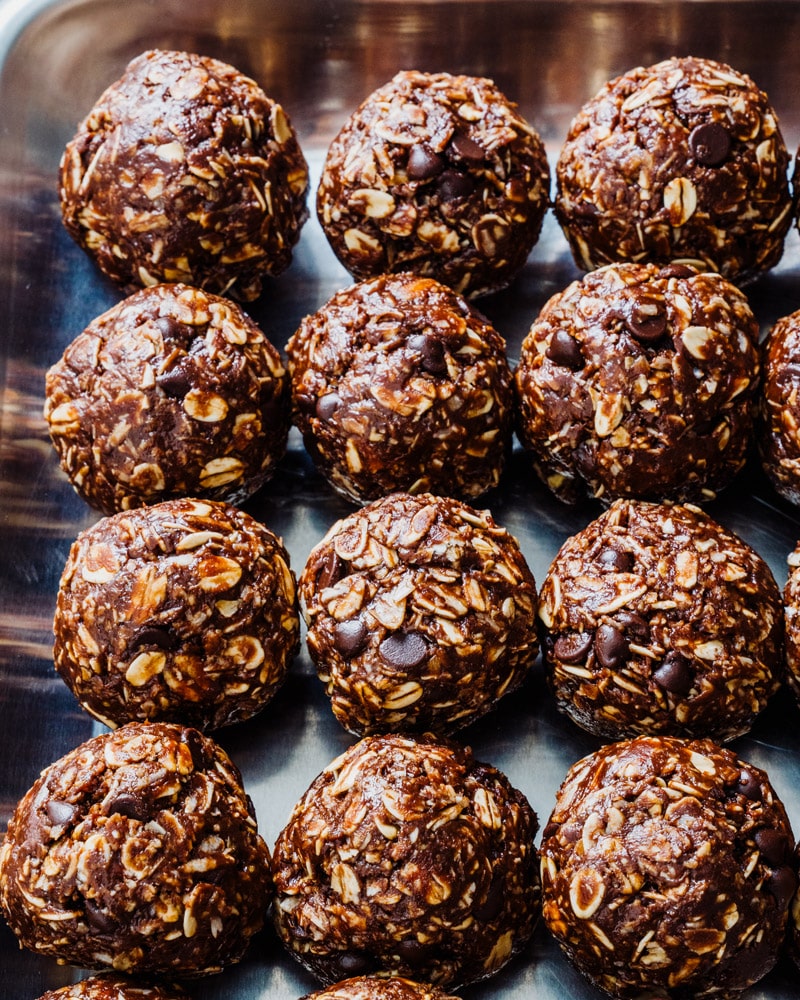
There’s nothing better than a snack that tastes like a treat: and this recipe covers both. Try these no bake energy bites! They taste like dessert, but they’re a simple combination of peanut butter, oats and honey.
There’s a teeny hint of chocolate thrown in too! To me they’re like store-bought energy bites but way tastier. The homemade version is extraordinarily delicious! Here’s how to make this delicious treat.
Why You’ll Love This Recipe
- No oven required. Just mix, freeze briefly, and roll! They’re done in 15 minutes.
- Pantry-friendly ingredients. Oats, peanut butter, and honey are likely already on hand.
- Stores for two weeks. Make a batch and snack all week long.
5 Star Reader Review
 “Yum! I love these! Easy, storable, healthy and just finger licking good! Thanks again you two!” -Monica
Ingredients You’ll Need
These no bake energy bites take no time to put together and just a handful of ingredients. In fact, you might already have these in your pantry! (Except the mini chocolate chips, though you might already stock those, too.) Here’s what you need:
- Old-fashioned rolled oats: Use old-fashioned (not quick oats) for the best chewy texture.
- Cocoa powder: Adds a rich, chocolatey depth.
- Mini chocolate chips: Mini chips distribute better than regular-size ones.
- Unsweetened shredded coconut: Adds subtle texture and a hint of tropical flavor.
- Creamy peanut butter: Use a no-sugar-added creamy brand for best results.
- Honey: Binds everything together. Use agave syrup for vegan.
- Cinnamon and kosher salt: These add just the right complexity in seasoning.
Want a variation without cocoa powder or coconut? Go to our Peanut Butter Energy Balls.

Tips for Making No Bake Energy Bites
The consistency of the dough in these energy bites varies based on the texture of the peanut butter. It can also vary based on the rolled oats. Here’s what to know:
- Use very creamy peanut butter. We don’t recommend using super thick peanut butter or even almond butter, which can be very thick right out of the jar. Creamy PB is best for this one!
- Start with a little less oats. Follow the recipe below for quantities! If the dough feels stiff, you can proceed. If the dough feels pretty sticky, add the full amount of oats.
- A #40 cookie scoop makes perfectly portioned balls. This makes 1 1/2-inch balls that are 1 ½ tablespoons. Here’s the #40 cookie scoop I use.
- Freeze, then adjust. Freezing the dough helps it set and become firm and rollable. If it’s not stiff enough add more oats; if it’s too crumbly add a hint more peanut butter and honey.
Peanut Butter Substitutes (Nut-Free Options)
Battling a peanut butter allergy? We know some classrooms and schools may not allow it due to allergies. Here are a few alternatives to peanut butter that work here:
- Sunflower butter: You can try sunflower butter, which is made from sunflower seeds. The flavor isn’t quite like peanut butter in a sandwich, but hidden by the other flavors here it can work.
- Tahini: Tahini is a great substitute for peanut butter, and it would be fantastic in these energy bites.
Storage & Make-Ahead Tips
These energy bites are good right away after you make them: but even better if you refrigerate for about 1 hour to set the texture. After that, they store well! Here’s what to know:
- Homemade energy bites last up to 2 weeks refrigerated. They likely last even longer than that. You could freeze them if you like, but we haven’t tested this.
- Bites last at room temperature in lunches. They become stickier when they’re room temperature, but they should last in brown bag lunches.
- If transporting, you’ll want to wrap them. If you’re bringing them somewhere as a snack, wrap in plastic wrap. They become stickier as they get warmer, so eat as soon as you can.
Dietary Notes
This no bake energy bites recipe is vegetarian, dairy-free and gluten-free. For vegan, plant-based, use agave syrup. For nut allergies, use sunbutter or tahini.
No Bake Energy Bites
These no bake energy bites are a wholesome snack that tastes like dessert and takes just 15 minutes to make! They’re made with peanut butter, oats, honey, and a hint of chocolate.
- Prep Time: 15 minutes
- Cook Time: 0 minutes
- Total Time: 15 minutes
- Yield: 20 1x
- Category: Snack
- Method: No Bake
- Cuisine: American
- Diet: Vegetarian
Ingredients
- 2 ½ cups Old Fashioned rolled oats
- ⅓ cup cocoa powder
- ¼ cup mini chocolate chips
- ¼ cup unsweetened shredded coconut
- ½ cup creamy peanut butter (no sugar added, or sunflower butter or tahini for nut free)
- ½ cup honey (or agave syrup for vegan)
- ¼ teaspoon kosher salt
- ¼ teaspoon cinnamon
Instructions
- Mix all ingredients together in a bowl, starting with 2 ¼ cups rolled oats. If the dough feels fairly stiff move to the next step; otherwise add the additional ¼ cup if the dough feels fairly sticky. (The texture depends of the dough depends on the type of peanut butter and type of rolled oats. With our very creamy peanut butter it works with 2 ½ cups oats total.) Freeze the bowl for 5 minutes to allow the dough to firm up even more: it should feel stiff and rollable at this point. If not, you can mix in a handful more oats — or if it’s too crumbly, add a hint more peanut butter and honey.
- Roll the dough into 20 small balls, pressing the dough together with your hands. A 1 1/2-inch cookie scoop (#40) is helpful to make uniform balls. Store refrigerated to firm up the texture even more, but you can eat immediately. Refrigerate for up to 2 weeks. (See the Storage Info section above for more on storage and transportation.)
More Energy Bars and Snacks
- Try these peanut butter oatmeal balls or no bake energy balls
- Make bars instead! Try oatmeal bars, peanut butter oatmeal bars or homemade granola bars
- Go for pecan energy bars or cashew energy bars
from A Couple Cooks https://ift.tt/Rmt1WYF
Comments
Post a Comment